Note_Tech
All technological notes.
Project maintained by simonangel-fong Hosted on GitHub Pages — Theme by mattgraham
Proxmox - Installation
Prerequisite
- Download
ProxmoxISO: Proxmox VE ISO - Create Bootable USB: Use Balena Etcher
Installation
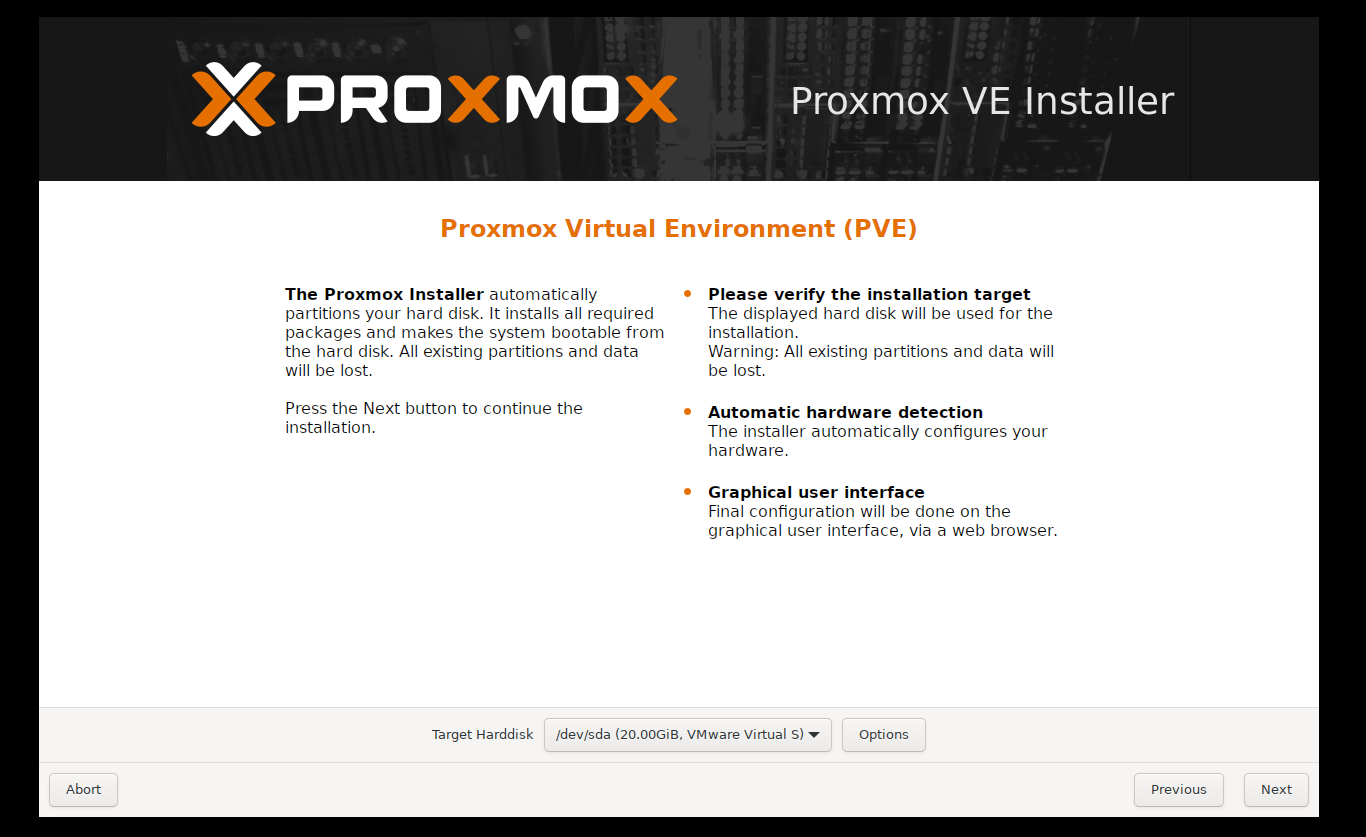
- Boot from USB
- Insert the bootable USB and start the machine.


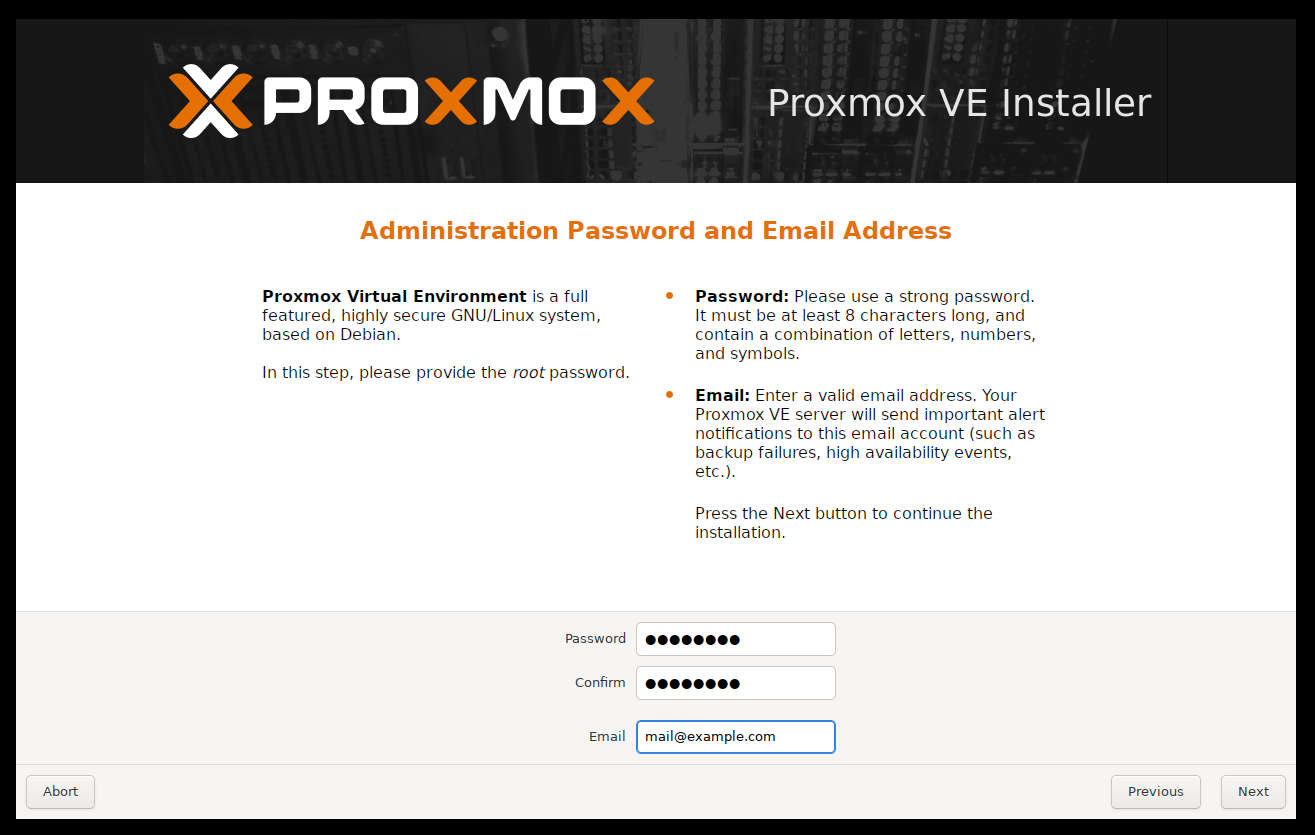
- Set Root Password:
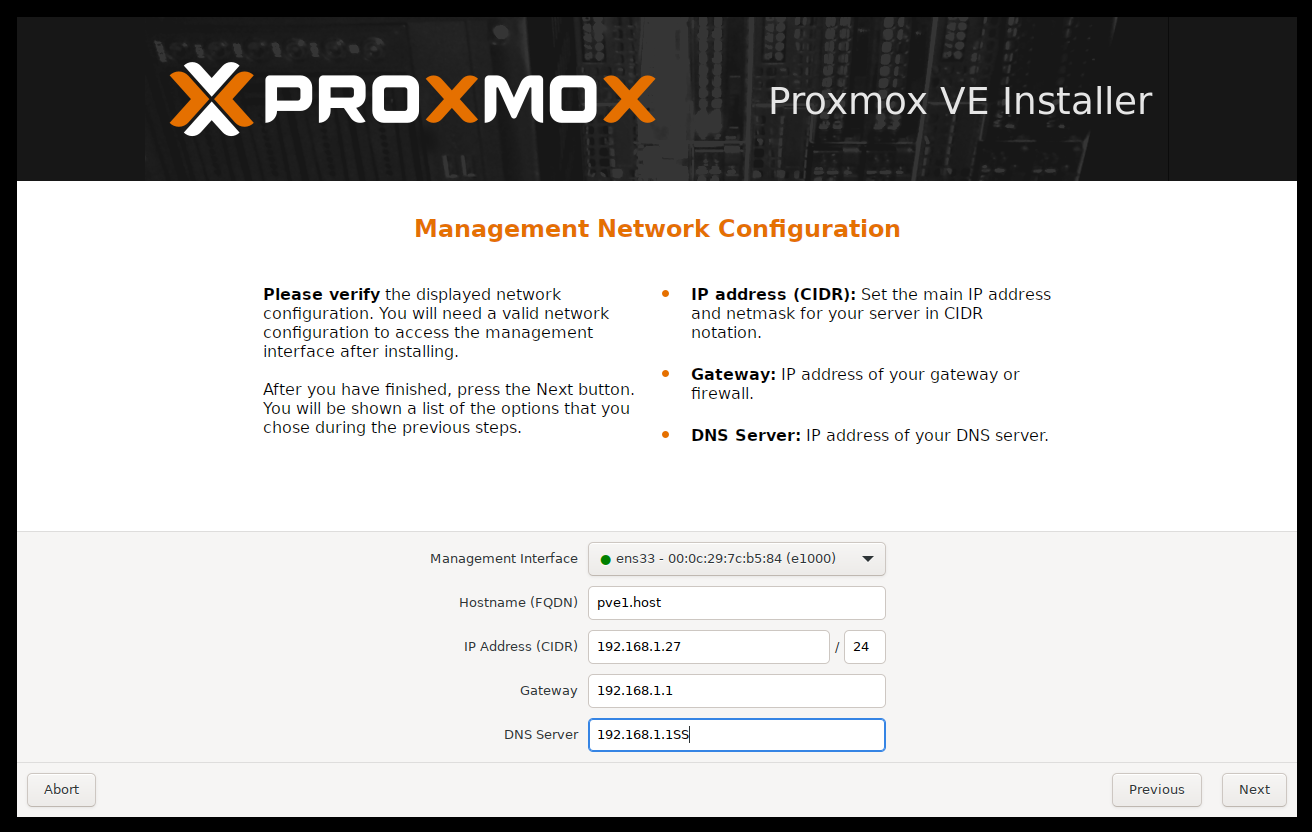
- Configure network
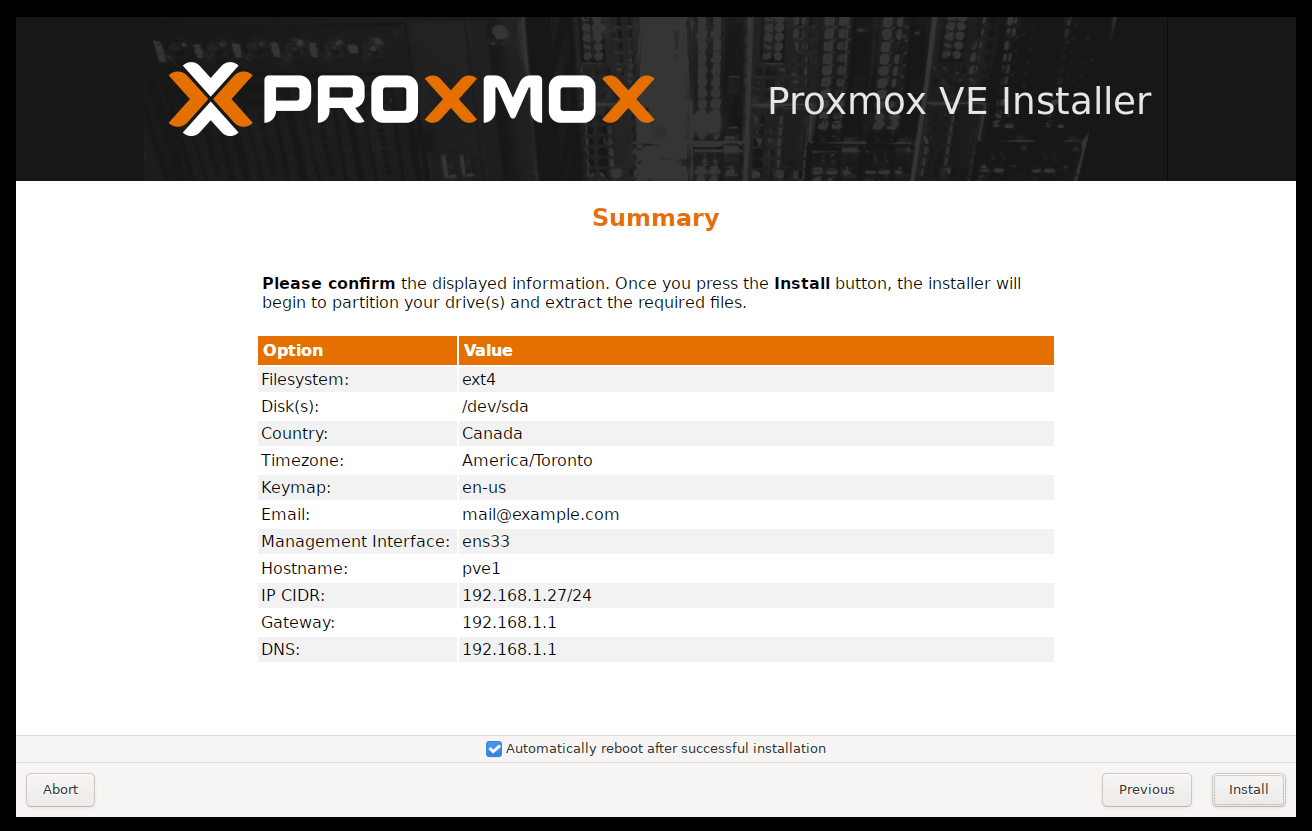
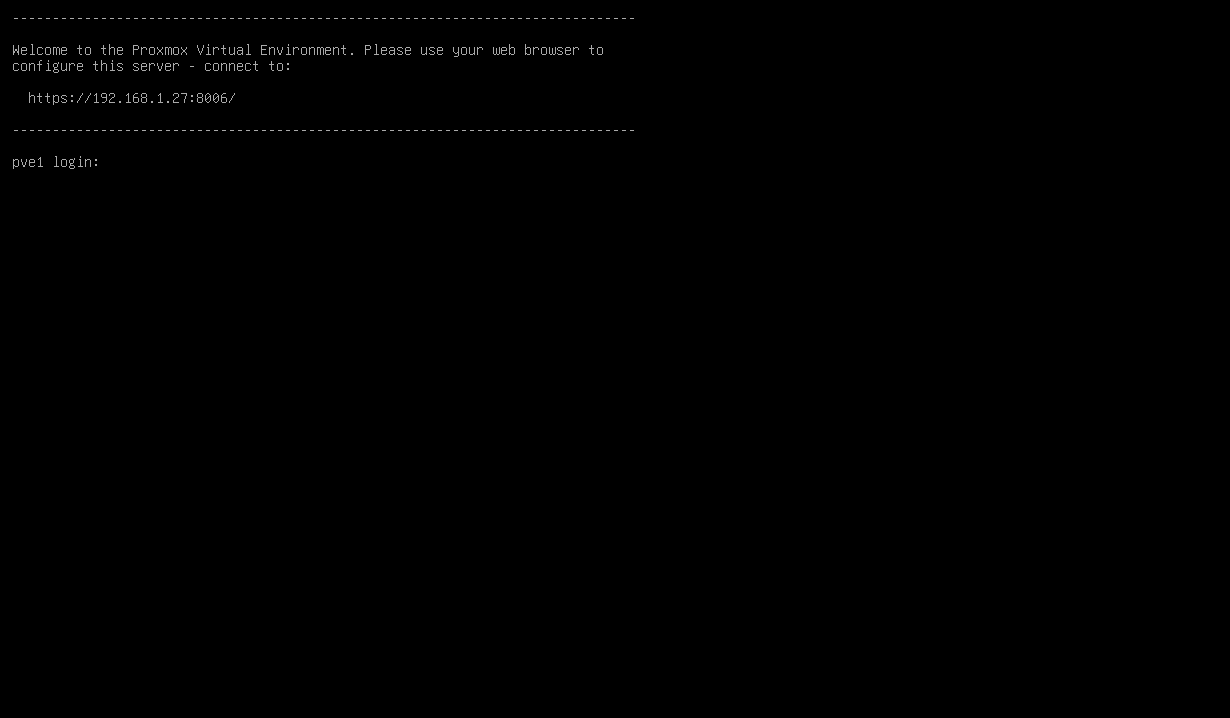
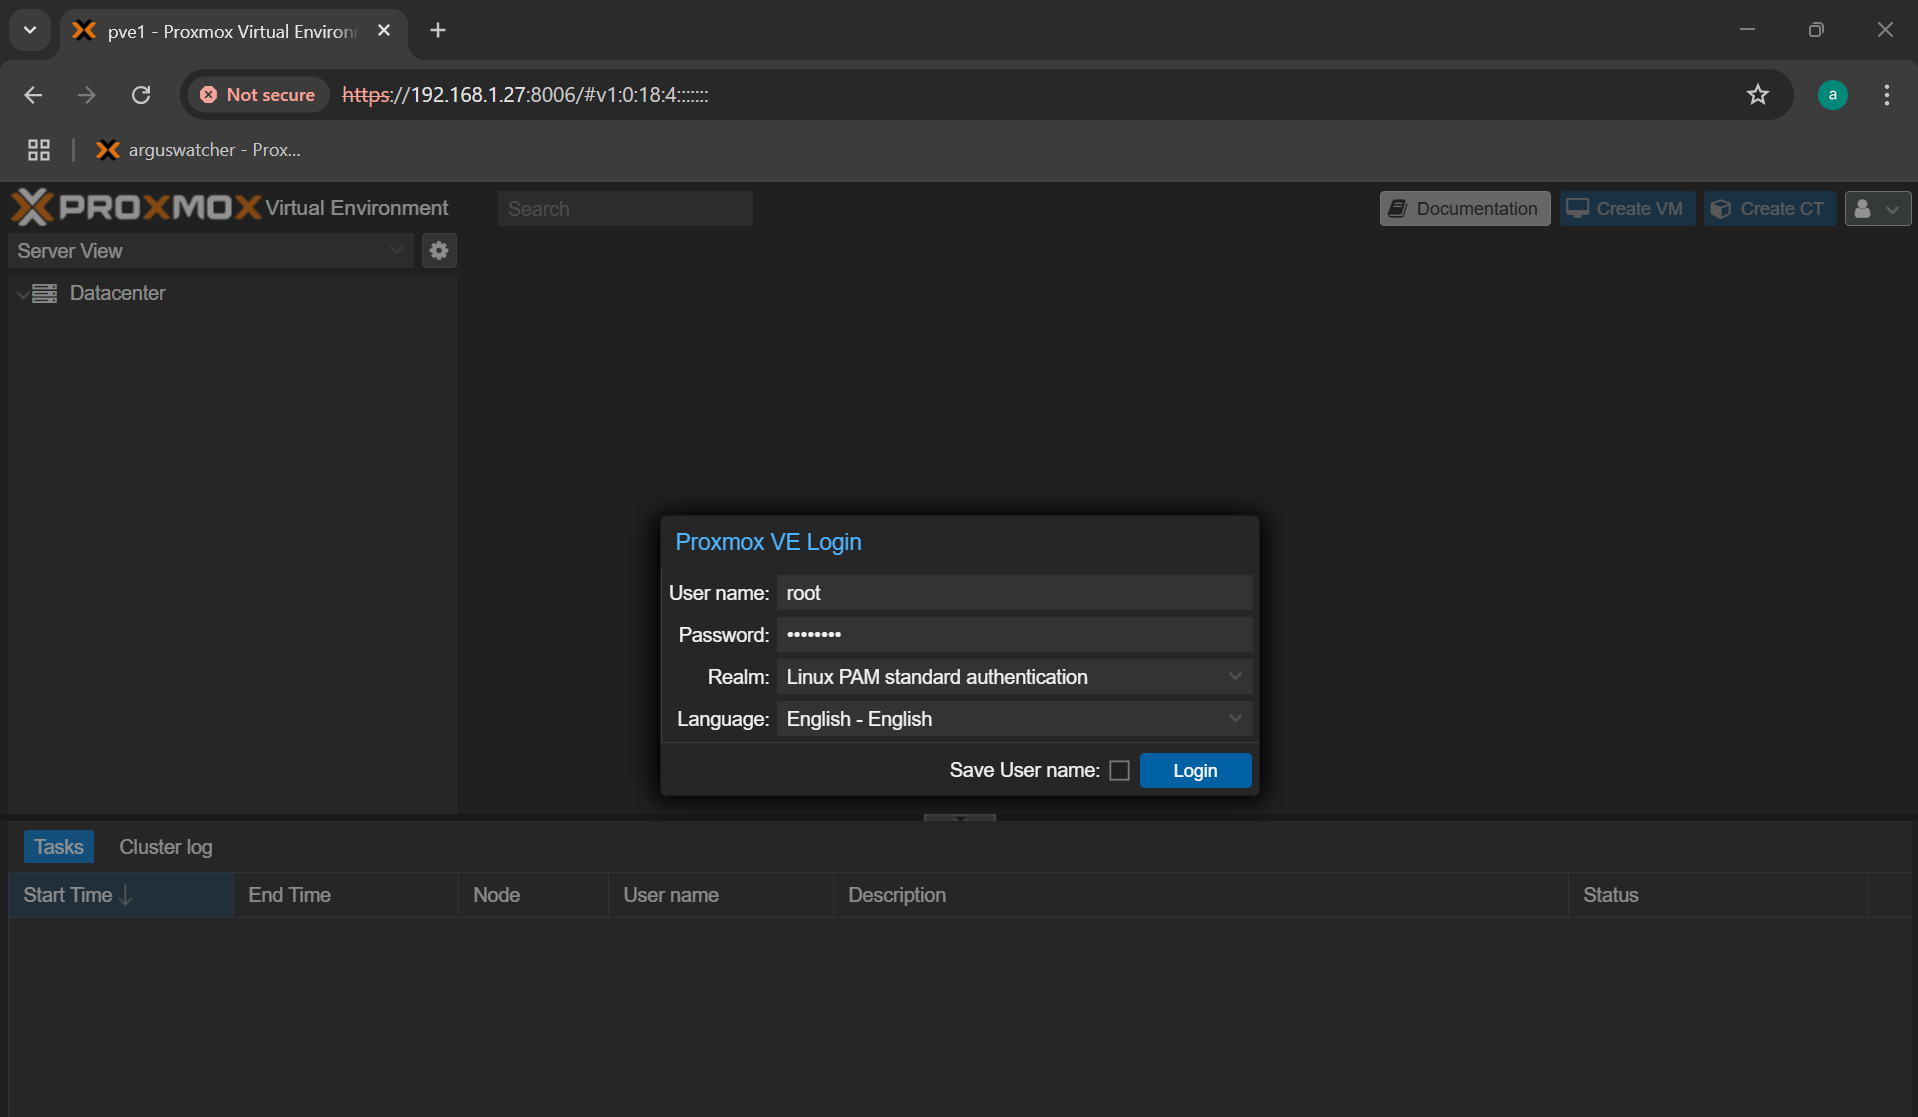
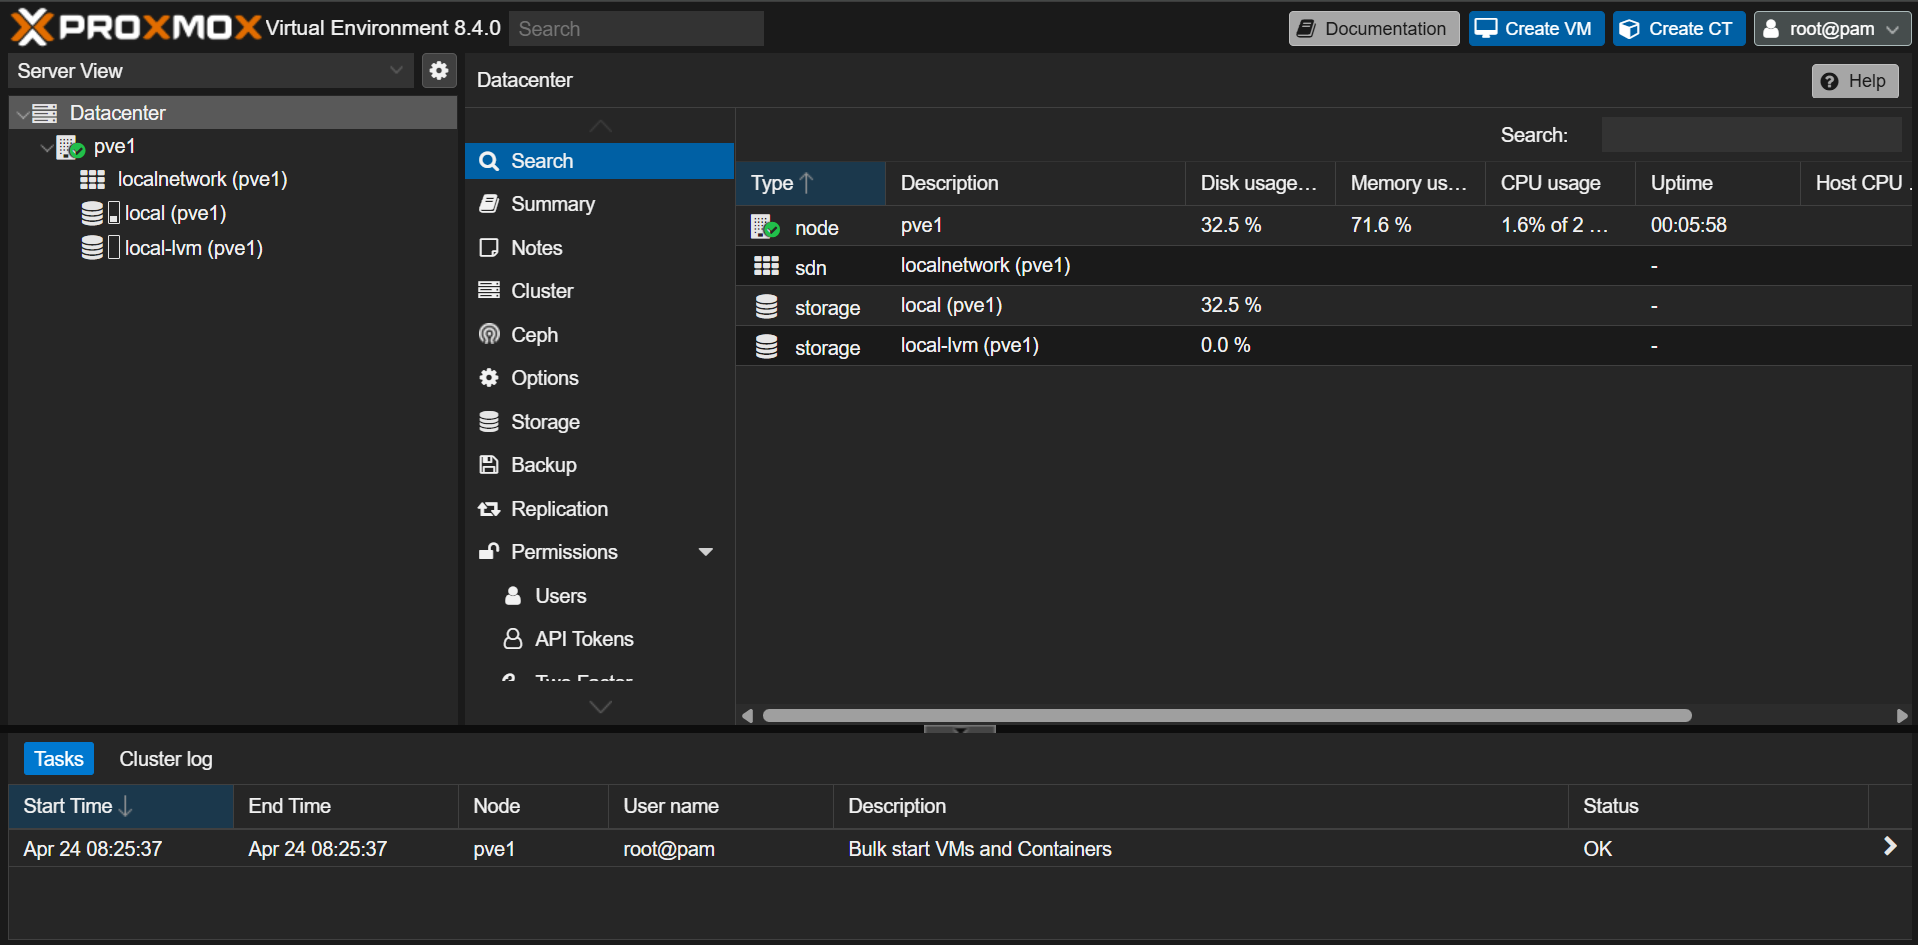
- Access Web GUI:
- Open a browser and navigate to
http://<host_ip>:8006.
- Open a browser and navigate to
Troubleshooting: Failed with Exit Code 1 at Line 1023
- Error:
command 'unsquashfs -f -dest /target -i /cdrom/pve-base.squashfs' failed with exit code 1 at /usr/share/perl5/Proxmox/Install.pm line 1023.
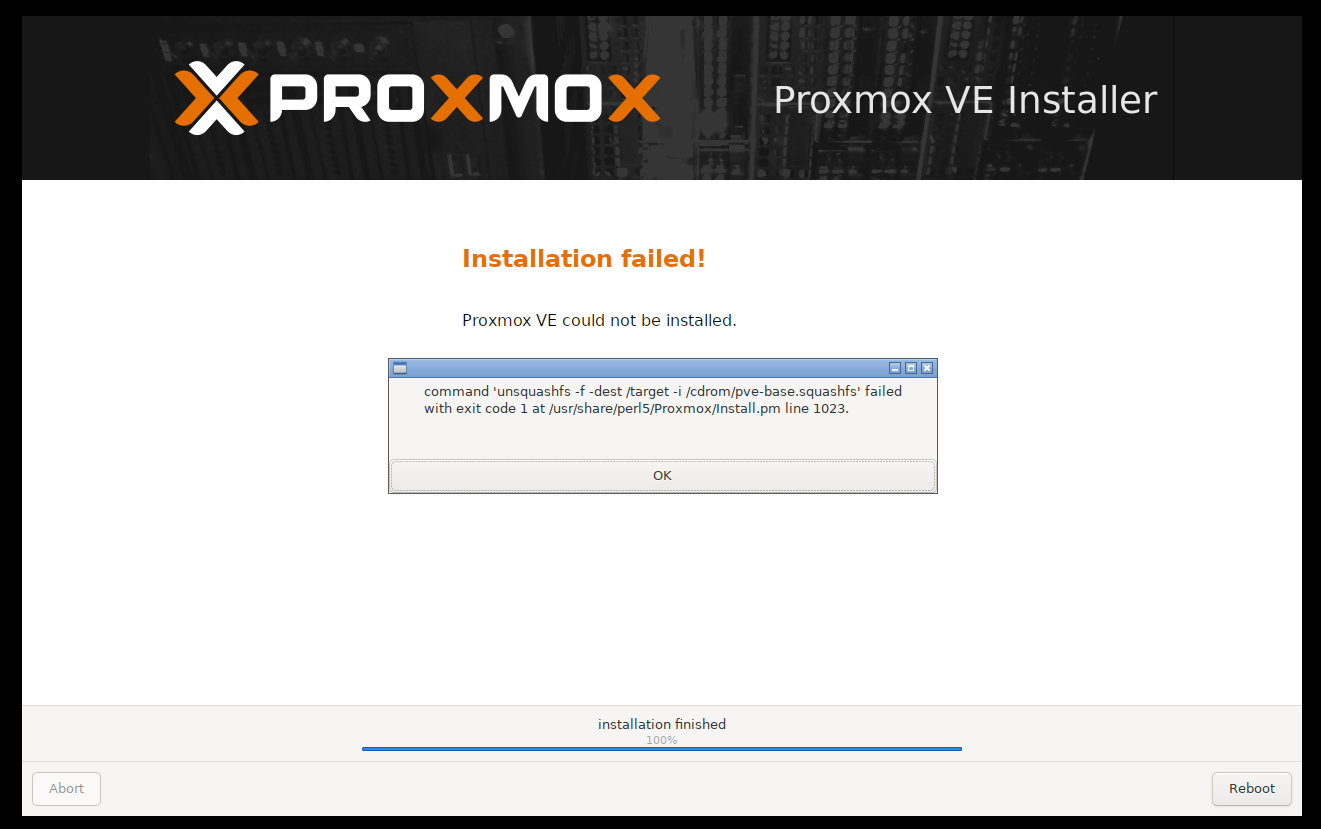
- Cause: Incompatible media (e.g., SD card).
- Solution: Use a USB flash drive.
Configure Physical Interface with Wi-fi
- Issue:
Proxmoxdefaults to Ethernet.- The physical interface with Wi-Fi requires additional configuration as
nmcliis not installed by default.
Step1: Install nmcli Package Offline
-
- Set up a
ProxmoxVM with network access.
- Set up a
-
- Update index and capture the reuiqed dependencies
# On a VM that installs Proxmox
apt update

apt install Network-Manager
# press no, to stop installation
# return the packages required for Network-Manager
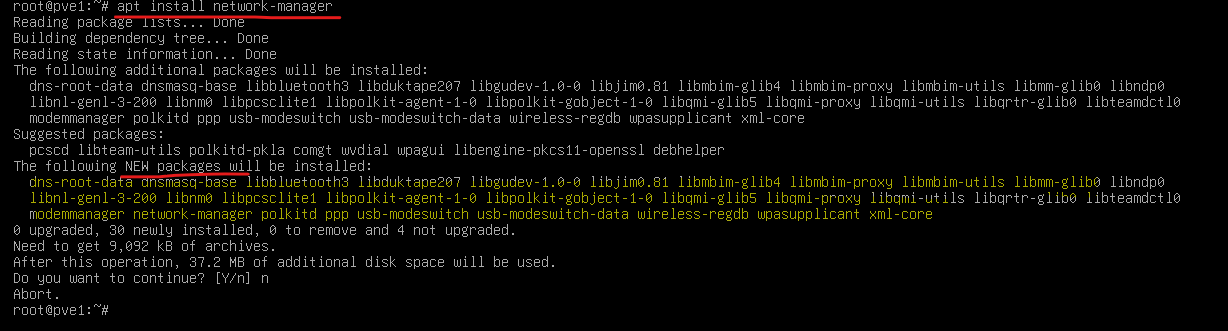
-
- Download packages and dependencies.
# on vm
# download package and dependencies
apt-get download network-manager dns-root-data dnsmasq-base libbluetooth3 libduktape207 \
libgudev-1.0-0 libjim0.81 libmbim-glib4 libmbim-proxy libmbim-utils libmm-glib0 libndp0 \
libnl-genl-3-200 libnm0 libpcsclite1 libpolkit-agent-1-0 libpolkit-gobject-1-0 \
libqmi-glib5 libqmi-proxy libqmi-utils libqrtr-glib0 libteamdctl0 modemmanager \
polkitd ppp usb-modeswitch usb-modeswitch-data wireless-regdb wpasupplicant xml-core
-
- Test offline installation on VM
# on vm
dpkg -i *.deb
nmcli -v  # Should return version if success
-
- Compress and transfer to the target machine using USB
# on vm
tar czvf ~/nmcli_pkgs.tar.gz *.deb
- Target machine: Install package and dependencies
# on target machine
dpkg -i *.deb
nmcli -v  # Verify version
Step2: Configure Wi-fi Connection
-
- Check Wi-Fi status:
# On target machine
nmcli radio wifi
# enabled

# In the case that wifi is disabled
nmcli radio wifi on

# In the case that the wifi interface is unmanaged.
# list interfaces
nmcli d

# Change the nmcli cf
nano /etc/NetworkManager/NetworkManager.conf
# change:
[ifupdown]
managed=true

# restart nmcli
systemctl restart NetworkManager
# confirm
nmcli device
-
- List and connect to Wi-Fi:
# List available Wi-Fi networks
nmcli d wifi list
# Connect to Wi-Fi
nmcli dev wifi connect "wifi_name" password "password"
# Set connection to autoconnect
nmcli connection modify "wifi_name" connection.autoconnect yes

# Verify connectivity:
ip a
ping -c 3 8.8.8.8
- Now the physical interface can connect with the Wi-fi
- The
Proxmoxhost is able to access Internet with physical interface.
- The
Bridge Physical Interface with Virtual Network Interface
- Architecture
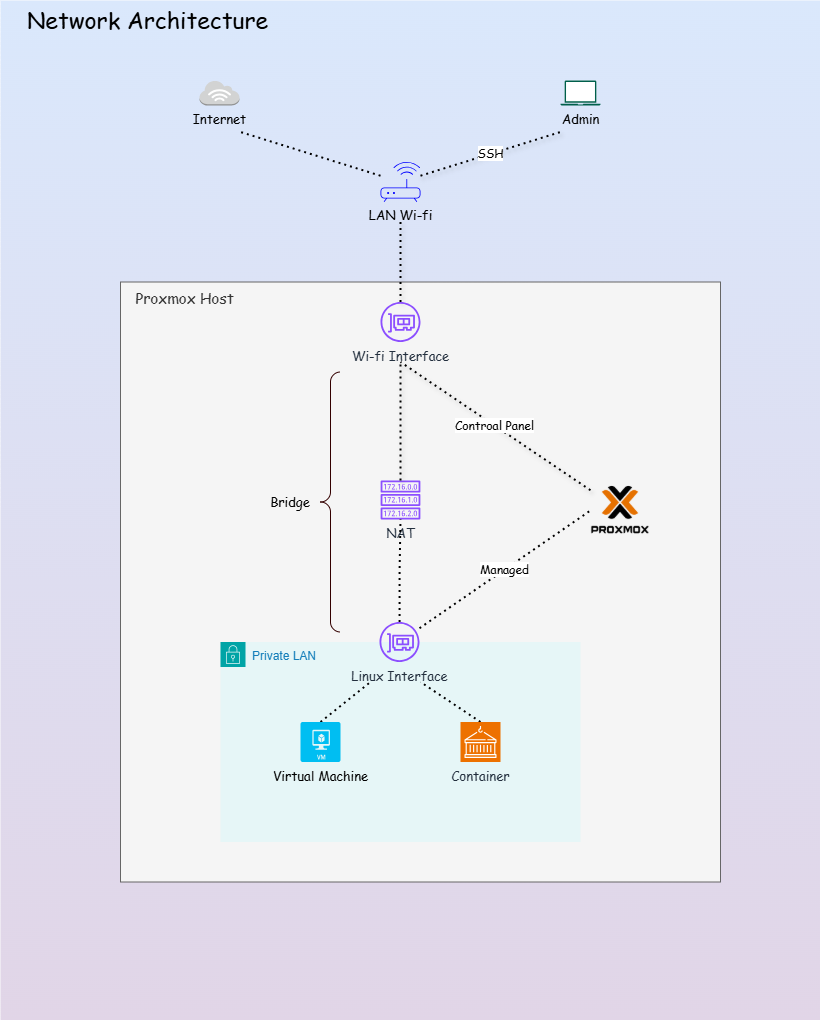
- Due to the Wi-fi connection, the Virtual Network Interface cannot bridge directly with the Physical Network Interface to enable VMs and containers in the
Proxmoxvirtual network to access external network or the Internet. -
2 Interface
- Physical Network Interface: the interface on the
Proxmoxhost machine that enables connection with Wi-fi network. - Virtual Network Interface: the interface used by
Proxmoxcontrol VMs and containers.
- Physical Network Interface: the interface on the
- Issue:
- VMs and containers in the Proxmox virtual LAN cannot access Internet.
- By default, Debian system use
ifupdownpackage, a low level package to manage the network. However, due to the use of Wi-fi, theNetwork-Manager, a high level pacakge, is install, creating protential configuration conflict.
- Solution:
- Using NAT to bridge 2 interface
- Only use
nmclifor the Wi-fi connection. Use thenetworkingservice to manage the network interface configuration.
Step 1: Configure Interfaces
-
Configure interfaces with 2 subnet
- wifi interface:
- auto enable
- using static mode
- setup ip, subnet, gateway, and dns based on the wi-fi network
vmbr0, the defaultProxmoxLinux interface- auto enable
- using manual mode for bridge
- setup ip, subnet, gateway
- bridge:
- none: not actively forwarding traffic, due to the wifi connection.
- stp off: no longer participate in the STP process.
- fd 0: forwarding delay is 0.
- wifi interface:
-
- Backup interface cf
# backup
cp /etc/network/interfaces /etc/network/interfaces.bak

cat > /etc/network/interfaces <<EOF
# Loopback
auto lo
iface lo inet loopback

# ethernet interface
iface enp6s0 inet manual

# Wi-Fi interface - used only for host
auto wlp7s0
iface wlp7s0 inet static
        address 192.168.1.80
        netmask 255.255.255.0
        gateway 192.168.1.1
        dns-nameservers 192.168.1.1 8.8.8.8

# Proxmox host IP on LAN
auto vmbr0
iface vmbr0 inet manual
        address 192.168.100.1/24
        bridge-ports none
        bridge-stp off
        bridge-fd 0
EOF
-
- Apply cf to wifi interface
# apply to interfaces
ifdown wlp7s0 && ifup wlp7s0
ifdown vmbr0 && ifup vmbr0

# confirm
ping -c3 192.168.1.1
ping -c3 8.8.8.8
ping -c3 google.com
- Test GUI access on the new ip
http://new_ip:8006
Step 2: Configure NAT
-
- Enable forwarding
# Enable forwarding
nano /etc/sysctl.conf
# net.ipv4.ip_forward=1

# Apply immediately:
sysctl -p
-
- Configure NAT
- Allow vLan access via wifi interface
- Allow
- Configure NAT
# clear all NAT rules
iptables -t nat -F
# clear all forwarding rules
iptables -F FORWARD

# NAT rule: map internal network to the Wifi interface
iptables -t nat -A POSTROUTING -s 192.168.100.0/24 -o wlp7s0 -j MASQUERADE
# Outbound rule: allow traffic from the internal network to the Wifi interface
iptables -A FORWARD -s 192.168.100.0/24 -o wlp7s0 -j ACCEPT
# Inboud rule: allow traffic from the Wifi interface to the internal network
iptables -A FORWARD -d 192.168.100.0/24 -m state --state ESTABLISHED,RELATED -i wlp7s0 -j ACCEPT

# confirm
iptables -t nat -L POSTROUTING -v -n
# pkts bytes target     prot opt in     out     source               destination
  # 0     0 MASQUERADE  0    --  *      wlp7s0  192.168.100.0/24     0.0.0.0/0
iptables -L FORWARD -v -n --line-numbers
# num   pkts bytes target     prot opt in     out     source               destination
# 1        0     0 ACCEPT     0    --  *      wlp7s0  192.168.100.0/24     0.0.0.0/0
# 2        0     0 ACCEPT     0    --  wlp7s0 *       0.0.0.0/0            192.168.100.0/24     state RELATED,ESTABLISHED


# persis the NAT
netfilter-persistent save
- Test on a VM within the vLan
ping -c3 192.168.1.1
ping -c3 8.8.8.8
ping -c3 google.com

apt update